.png)
Urban gardening in India is more than a trend – it’s a rewarding hobby that brings nature into your home. Whether you live in a high-rise apartment or a house with a tiny balcony, you can grow a slice of green paradise.
In recent years, especially since the COVID-19 pandemic, urban farming has undergone a surge in popularity across India.
People are discovering the joy of harvesting home-grown herbs and vegetables, the health benefits of gardening, and the simple pleasure of nurturing plants.
Even government bodies have started encouraging it – for example, the Telangana Horticulture Department launched a “Vegetable Growing in Urban Areas” scheme in 2012 to help city dwellers grow fresh, pesticide-free vegetables at home.
Ready to start your own urban garden? This friendly step-by-step guide will walk you through the process.
From deciding the type of garden to picking the right soil, plants, and tools, we’ve got you covered. Let’s grow that green thumb!
Introduction to Urban Gardening in India
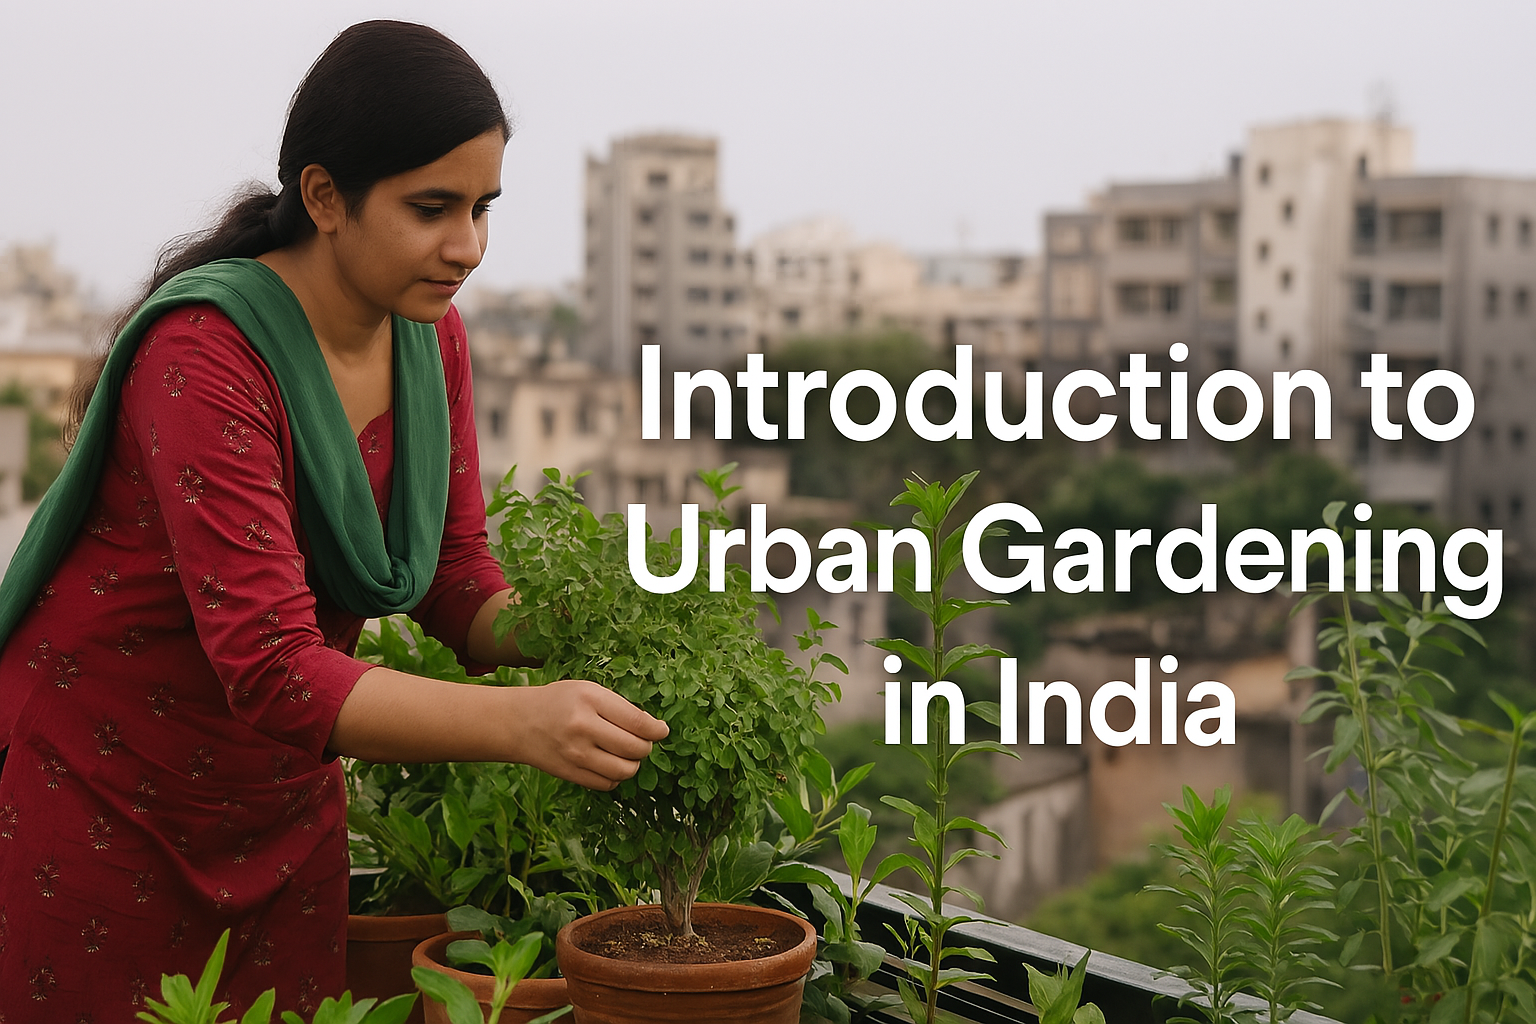
Urban gardening (also known as container gardening or terrace gardening) means growing plants in the limited spaces of cities – be it balconies, rooftops, window sills, or small yards. India’s diverse climate offers year-round opportunities for gardening if you plan wisely.
No matter where you are – a humid coastal city or a dry inland town – you can adapt your garden to thrive. The key is to start small and learn as you go.
Gardening is a journey: it’s okay to have some failures (every gardener does!). With patience and these tips, you’ll soon have a lively little garden to call your own.
Why urban gardening?
For many Indians in apartments, a garden provides fresh herbs and veggies at arm’s length, saves money, and ensures you know exactly how your food was grown (no nasty pesticides!).
It also brightens up your living space and can even reduce your home’s temperature slightly by adding greenery. Plus, tending plants is a great stress-buster – a daily dose of nature right in your home.
In the guide below, we break down 10 easy steps to start your urban garden, complete with India-specific advice.
We’ll also mention some handy products and brands (like Urban Plant, TrustBasket, Kraft Seeds, etc.) that can help Indian beginners get started. Let’s dig in!
Read also: How to Make Vermicompost Successfully at Home With Steps
Step 1: Decide What Type of Garden You Want
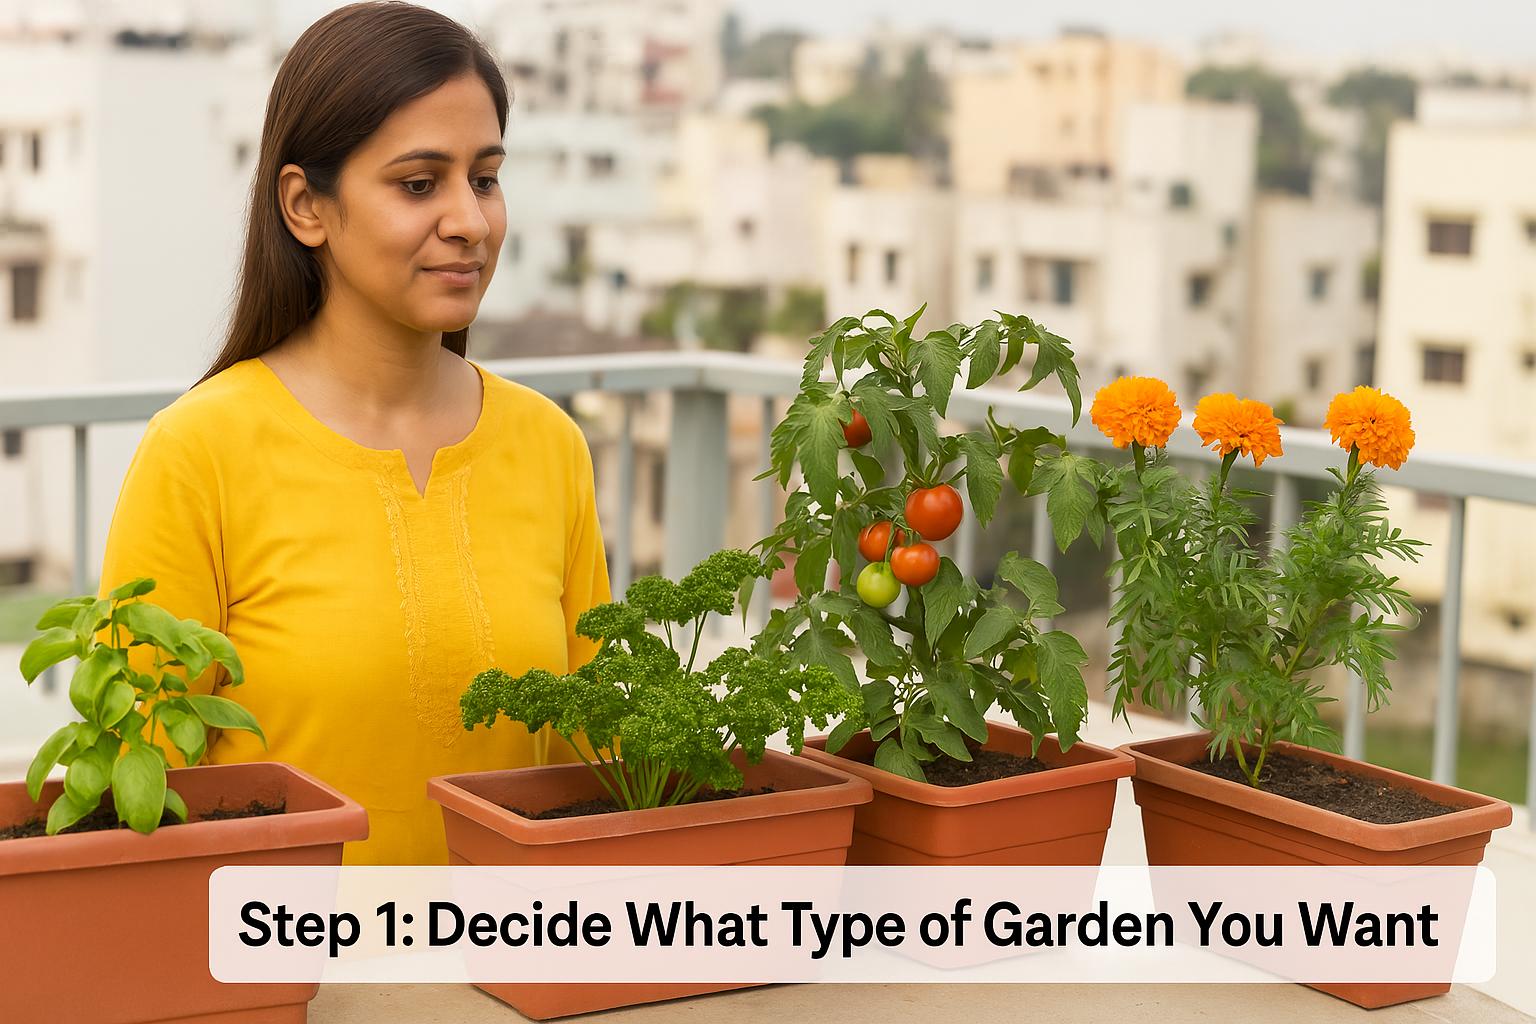
The first step is to decide on the type of garden you’d like, based on your interests and lifestyle.
Ask yourself: What do I want to grow, and why? Some popular options for beginners include:
- Herb Garden: If you love cooking, a kitchen herb garden is ideal. You can grow culinary herbs like mint (pudina), basil (tulsi), coriander (dhaniya), curry leaves, and lemongrass. These don’t take much space – small pots on a windowsill or balcony are enough. Herb gardens are low-maintenance and provide fresh flavor for your meals.
- Vegetable Garden (Kitchen Garden): Growing your own veggies can be extremely rewarding. Decide which vegetables your family eats often. Start small with easy veggies and those that fit your climate (more on climate in Step 4). For example, you might plant a couple of tomato or chili plants, a pot of okra, or some leafy greens. If you’re new, it’s best to begin with quick-growing veggies. As one expert suggests, short-term veggies like spinach, fenugreek (methi), coriander, mint, lettuce, or radish are great for beginners. They can be harvested in a month or so, giving you quick success. Longer-term veggies (like tomatoes, brinjal/eggplant, peppers) take 2-3 months to mature.
Flower Garden: Maybe you want a splash of color to beautify your balcony. Flowering plants are perfect for this. You can grow ornamental flowers in pots – think marigolds, petunias, zinnias, or cosmos. These are easy flowers for beginners in India, known for being low-fuss and blooming readily- Succulent or Indoor Greenery: If you have very limited space or low sunlight, you might opt for hardy indoor plants or succulents. Plants like snake plant (Sansevieria), pothos (money plant), peace lily, or aloevera can green up indoor corners with minimal care. While these might not give you veggies to eat, they purify air and satisfy the gardening itch.
By deciding on the garden type, you set a clear goal. Of course, you can combine them (e.g., a couple of vegetable pots, a few herbs, and one flowering pot). Starting small is key – a few pots that you can comfortably manage.
You can always expand as you gain experience. Remember, the goal is to enjoy the process, so choose plants that excite you. If growing your own food excites you, go for veggies; if you want a calming green view, maybe focus on ornamentals.
Pro Tip: It’s wise for beginners to “grow what you eat.” Focus on plants whose output you’ll actually use. For example, if you drink tulsi tea, growing a tulsi (holy basil) plant makes sense. Love spicy food? Grow your own green chilies. This ensures your garden is practical and rewarding.
Step 2: Choose the Ideal Location
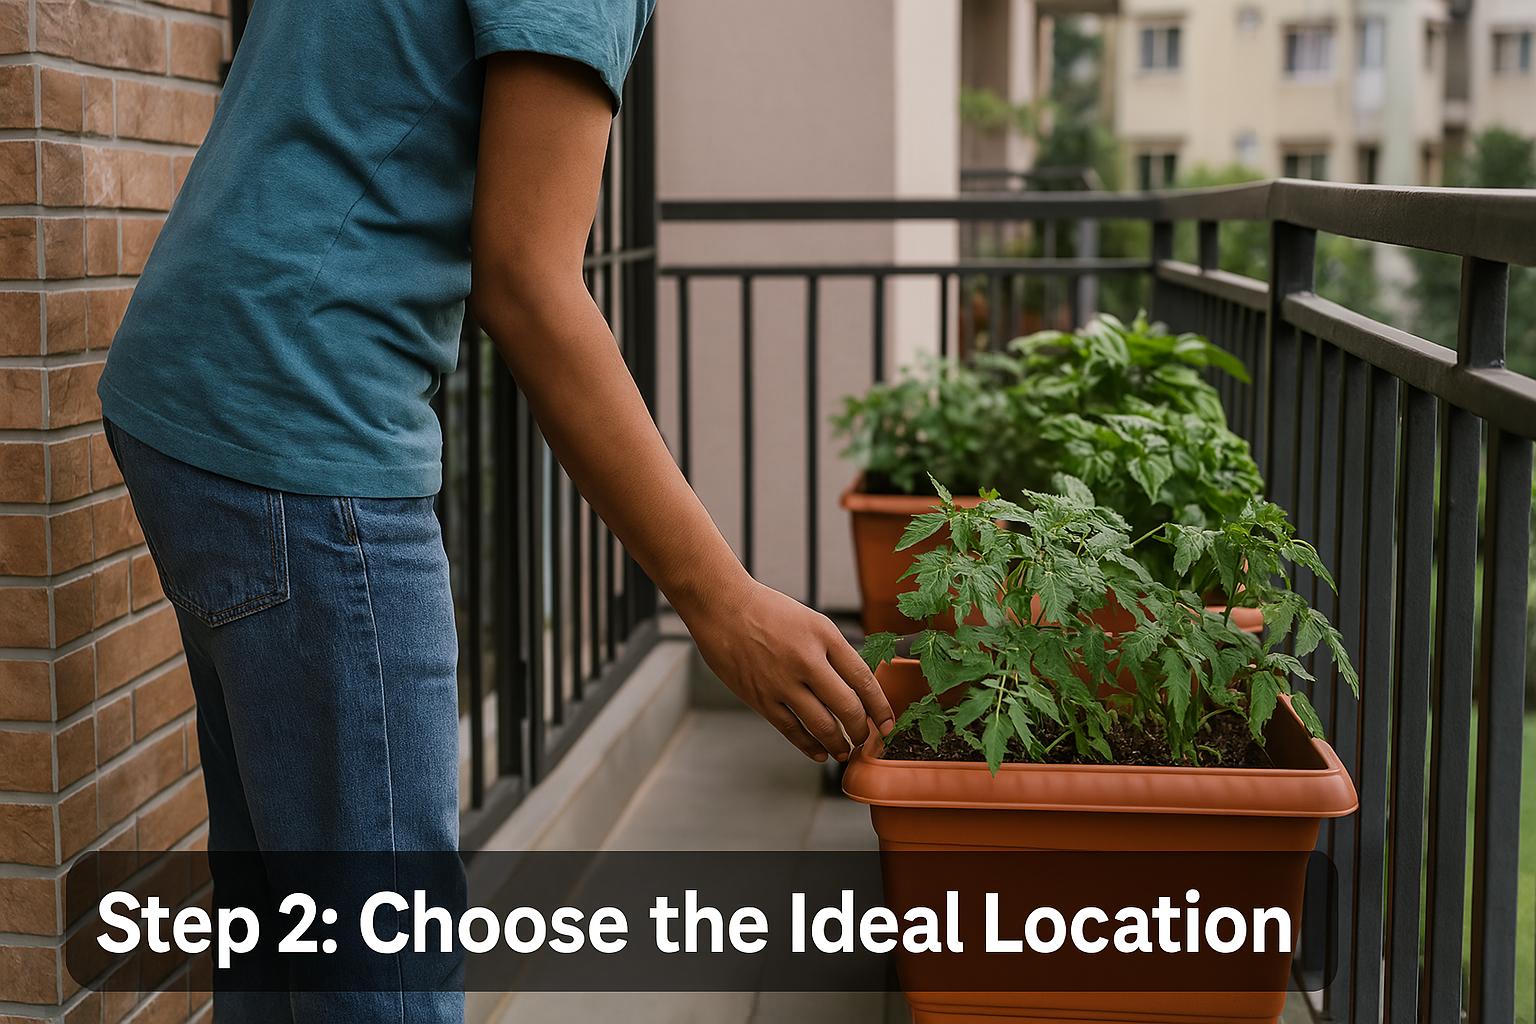
Once you know what you want to grow, identify where you can set up your urban garden. In Indian cities, the common spots are balconies, terrace rooftops, windowsills, doorsteps, or even vertical walls. When choosing your garden location, consider these factors:
Sunlight: This is crucial. Most vegetables and flowers need 4-6 hours of direct sunlight daily to thrive. Observe your potential spaces – does your balcony get morning sun (east-facing) or afternoon sun (west-facing)? South-facing balconies usually get plenty of light most of the day, while north-facing ones may get very little direct sun except in summer.
Space & Layout: Evaluate how much physical space you have. A large open terrace gives you freedom to use big pots or even raised beds. A small apartment balcony might only fit a few planters. But don’t worry – even 4-5 pots in a tiny balcony can make a thriving mini-garden. Use vertical space to your advantage: you can install railing planters, wall-mounted pots, or hanging baskets to increase planting area without crowding the floor. Ensure the spot has some protection from strong winds (wind can dry out plants quickly or topple tall plants – if your balcony is very windy, use sturdier pots and consider a windbreak like a bamboo screen). Also, consider convenience: you should be able to access the plants for watering and care. For example, if using a rooftop, ensure it’s safe to go up and down frequently and you can carry water there.
Water access: Your garden spot should be relatively easy to water. If outdoors, is there a tap nearby or will you carry a watering can from the kitchen? Balconies usually rely on manual watering with a can or bottle. Check that excess water can drain away without causing problems (most balconies have a water outlet – make sure it’s not clogged so that drained water from pots can flow out). If using an indoor spot, you might place trays under pots to catch drips.
Floor and structure safety: In India, most balconies and terraces are built strong enough for some pots, but avoid extremely heavy containers on a weak structure. Use lighter weight grow bags or plastic pots on high-rise balconies instead of very heavy ceramic pots, to reduce load. If renting, confirm with your landlord if needed (though generally a few plants are fine). Also, secure any pots placed on railings or edges to prevent accidents (you don’t want a gust of wind knocking a pot off a balcony).
Community or rooftop gardens: If your own apartment has limited space, consider community initiatives. Some buildings allow residents to use common terrace areas for gardening. Or join local community gardens if available. This might not be common in all Indian cities yet, but it’s worth exploring – for example, some RWAs (Resident Welfare Associations) have started community vegetable patches.
In summary, choose the sunniest, most convenient spot you have. If that’s just a humble windowsill, start there. If you’re lucky to have a big terrace, great – just start in one corner of it. The ideal location has good sun, is easy for you to work in, and has proper drainage. Once you’ve picked your spot, you can move on to gathering the things you need.
Step 3: Prepare Your Gardening Essentials and Tools
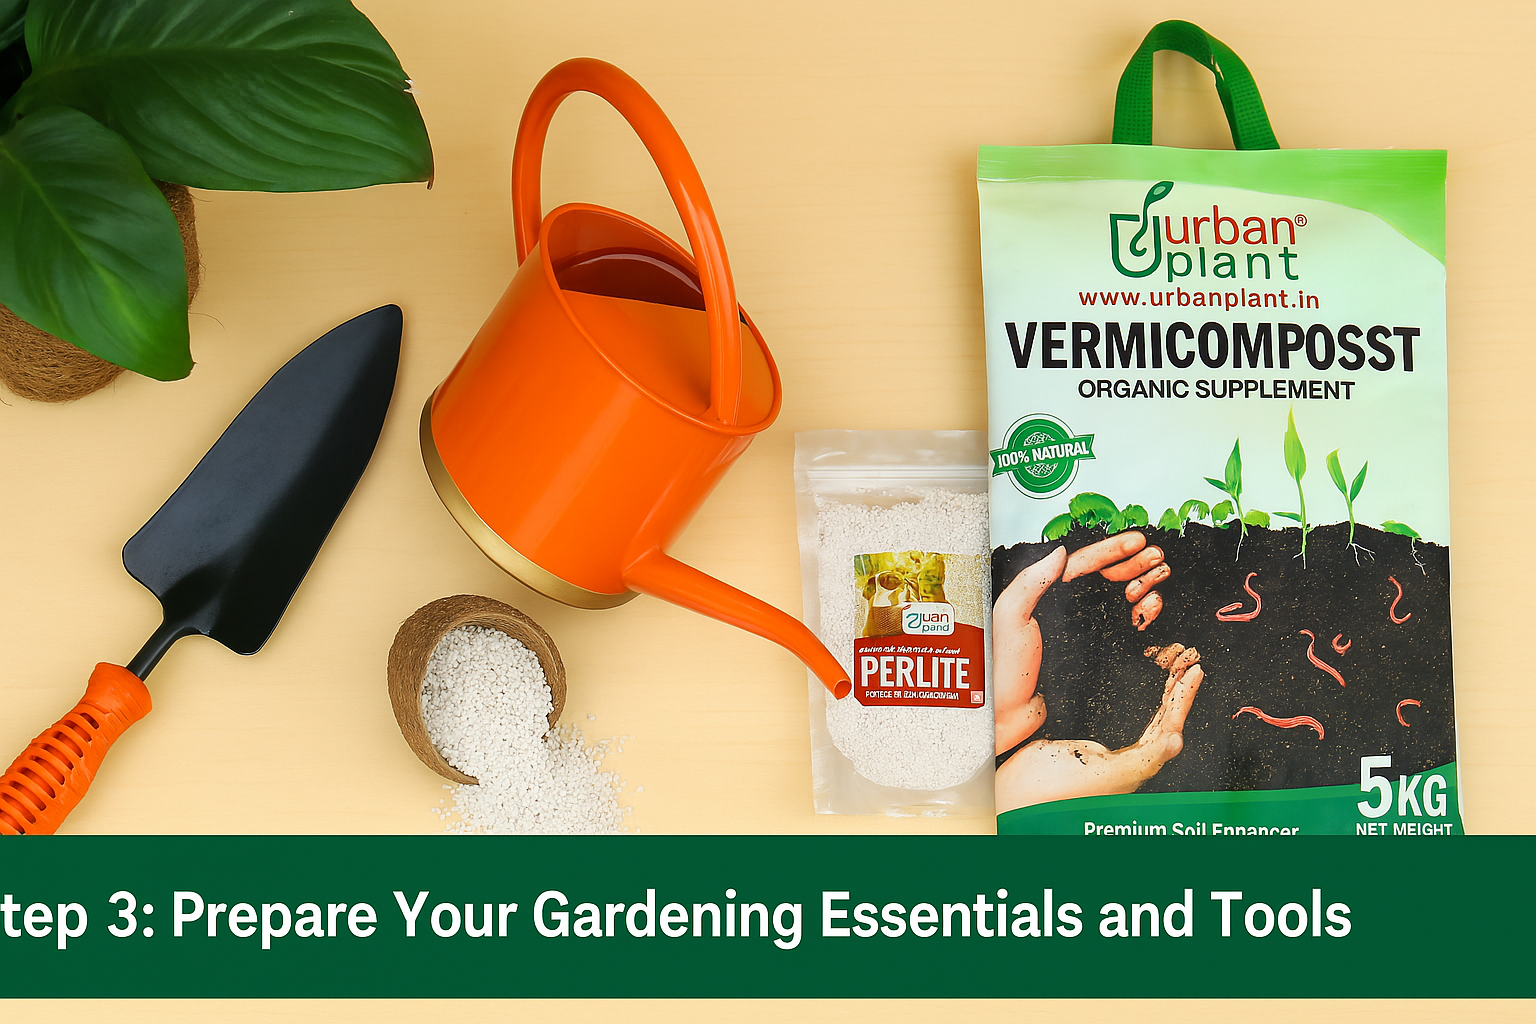
Now it’s time to gather some basic gardening supplies. You don’t need an entire gardening shed like a professional – just a few essentials will set you up. Here’s a checklist for Indian beginner gardeners:
- Containers/Pots: Since this is urban gardening, you’ll likely use containers (unless you have ground soil available). You can use flower pots, planters, trays, hanging baskets, or even recycled containers. Terra-cotta (clay) pots are traditional and plant-friendly (they’re porous, which is good for roots) but can be heavy. Plastic pots or grow bags are lightweight and inexpensive. Reuse what you have: old buckets, paint cans, oil tins, or plastic bottles can become pots (just ensure to poke drainage holes!).
- Potting Mix/Soil: We will discuss soil in detail in Step 5, but as part of essentials, you need a good growing medium. Many beginners buy ready-made potting mix (which is usually a blend of soil, cocopeat, compost, etc.). Don’t just dig up random soil from outside for containers; urban construction soil might be too compacted or full of rubble. Invest in a quality soil mix so your plants have a healthy start.
- Basic Tools: A few hand tools make gardening easier. The most useful ones are a hand trowel (small spade) for digging and scooping soil, a hand cultivator or fork for loosening soil, and a pair of pruning scissors or garden shears for trimming plants. You can buy an affordable 3-5 piece gardening tool kit (many are available online; Kraft Seeds and TrustBasket offer beginner tool sets). These kits typically include a trowel, cultivator, small rake, pruning shear, and maybe a transplanter – plenty for container gardening. Also nice to have: gloves (to keep hands clean and safe from prickly plants), and a watering can with a gentle rose head (spout) that showers water without washing out the soil. If you don’t have a watering can, you can use a jug or bottle with holes punched in the cap for a gentle sprinkle.
- Seeds or Seedlings: Depending on what you decided to grow, get your seeds, saplings, or bulbs. For beginners, seeds of easy plants are readily available and cheap. You can buy vegetable and herb seeds from brands like Kraft Seeds, National Seeds Corporation, or Nurserylive, etc. These days, even e-commerce sites (Amazon, Flipkart) and local nurseries stock a wide variety of seeds. Make sure to get fresh seeds for better germination (check packing date on seed packets). Alternatively, you can buy seedlings (young plants) from a local plant nursery if available – this can jump-start your garden as you won’t need to germinate seeds.
- Fertilizers and Plant Food: While not immediately needed on day one, it’s good to have some plant nutrients on hand for later. Common options in India include organic fertilizers like vermicompost, neem cake, bone meal, seaweed extract, etc., and chemical options like balanced NPK fertilizers (e.g., a popular one is NPK 19-19-19 water-soluble fertilizer). As a beginner, you can keep it simple: buy a bag of vermicompost or well-rotted manure to mix into your potting soil (this acts as a slow-release fertilizer).
- Pest Control Basics: It’s optional to get these upfront, but having an organic pesticide on hand can save you stress later. A bottle of neem oil (neem ka tel) is highly recommended – it’s a natural insect repellent and widely used in organic gardening. Also, a mild soap solution (liquid dish soap diluted in water) can tackle common pests like aphids. You might consider buying a ready-made organic pesticide or fungicide from a garden store – some brands offer neem oil sprays or bio-pesticides that are safe for edibles. Again, this isn’t mandatory on day one, but good to have in your arsenal.
Don’t let this list intimidate you – you might already have some items (old pots or bottles can substitute for fancy planters, an old kitchen spoon can work as a trowel in a pinch, etc.).
Indian brands like Urban Plant, TrustBasket, Kraft Seeds, Ugaoo, Gardenia, etc., are one-stop shops where you can order soil, pots, tools, and seeds with a few clicks. Many beginners order an “urban gardening kit” which includes basic pots, potting mix, seeds, and fertilizer – convenient if you want everything in one go.
Step 4: Understand Indian Climate & Gardening Seasons
India’s climate is diverse, so understanding the gardening seasons will help you plan what to grow and when.
Unlike temperate regions that have only spring/summer for gardening, in most of India you can grow something all year round, but the types of plants will vary by season. Here’s a breakdown:
- Summer (March–June): In most parts of India, these months are hot and dry (except maybe coastal regions which are humid). Summer can be challenging for plants due to extreme heat in many areas. However, certain plants thrive in heat. For example, okra (bhindi), bitter gourd (karela), ridge gourd (tori) and other gourds love the warmth and can be sown towards the end of spring (March-April) to grow through summer. Sun-loving flowers like zinnias, portulaca, and periwinkle (sadabahar) also bloom beautifully in summer. The key in summer is to provide some shade during peak afternoon sun if temperatures soar above 40°C, and keep up with watering (often twice a day for pots in extreme heat).
- Monsoon (June–September): The rainy season is a boon for plants – natural watering and slightly cooler temperatures (at least after the scorching May). This is a great time to grow many vegetables. July and August are ideal for planting vegetables like beans, gourds, chilies, and tomatoes, as the rains help them establish. In fact, traditionally, kharif season (monsoon) is when you plant warm-weather crops. You can start seeds just before or at the onset of monsoon so that young plants get rain.
- Autumn/Winter (October–February): This is the cool season in most of India (though “winter” can mean 10°C in North India and 25°C in South – very different!). The months of October and November are prime for sowing many popular vegetables that prefer cooler weather. These include tomatoes, peas, carrots, radish, cauliflower, cabbage, spinach, fenugreek, and lettuce. In fact, the traditional rabi season (winter) crops like peas, carrots, and leafy greens can be easily grown in an urban garden. If you’re in a frost-free area (most of India’s metros don’t get frost except maybe the outskirts of Delhi/North), you can grow veggies all through winter into early spring. Flower-wise, winter is the time for petunias, pansies, dianthus, calendula, and marigolds – these add vibrant color and do well in the cooler, drier air.
- Regional Variations: India’s climate zones differ – for instance, Kerala and Karnataka have long monsoons and shorter winters, the North has extreme summers and a definite winter, the Northeast has heavy rains, etc. The timing of what you plant may shift based on local conditions. If you live in a place like Bangalore or Mumbai, the climate is relatively moderate year-round, so you can attempt multiple cycles of planting. In a place like Delhi, you will time things more strictly (e.g., tomatoes typically planted after frost risk is over, around February, and again in July for a second crop). Don’t be afraid to experiment – nature is forgiving.
Gardening Calendar to start Garden In India
To simplify, here’s a quick basic calendar for a few common veggies:
- Jan-Feb: Start seeds of tomato, chili, brinjal indoors (especially in North India) to transplant later. Direct-sow peas (they like cooler weather). Also sow carrots and radish.
- Mar-Apr: As it warms, plant cucumbers, beans, okra (these can be sown as the last frost passes or weather warms). Time to also transplant those tomato and chili seedlings outside.
- May-Jun: Hot season crops like okra (bhindi) do well – plant in May. Bitter gourd, bottle gourd can be sown as monsoon nears.
- Jul-Aug: Peak monsoon – sow beans (cluster beans, french beans) in July. Plant gourds like bottle gourd, pumpkin in early monsoon. Also a good time to start cabbage/cauliflower seeds (they’ll be transplanted for winter)
- Sep-Oct: Sow spinach, fenugreek (methi) in September for quick greens. Start cauliflower, cabbage seeds by Sep and transplant in Oct. Plant lettuce in October when it’s cooler. Also sow turnips, beets, and more peas.
- Nov-Dec: Sow leafy greens continuously (spinach, lettuce can be succession planted every few weeks). Start capsicum (bell peppers) and tomato seeds indoors towards late Dec for the spring planting, especially in North India.
This is a general guide – adjust for your city’s climate. For instance, Chennai might allow year-round okra, whereas Shimla’s winters might halt most planting. Many gardeners keep a diary of what they planted when, to refine their own calendar.
Understanding the seasons helps you choose the right plant at the right time, which greatly increases your success.
A common mistake is trying to grow a plant in the wrong season (like sowing broccoli in May – it won’t be happy).
So, when you buy seeds, check if it’s the appropriate season to plant them. Seed packets often mention the best sowing months for India.
Finally, remember that extreme weather (heatwaves, heavy rains) can stress plants.
During a heatwave, you might need to shade your plants or water more; during incessant rain, you might move potted plants to a slightly sheltered spot.
With a bit of care, your garden will weather the seasons nicely.
Step 5: Select the Right Soil and Prepare It
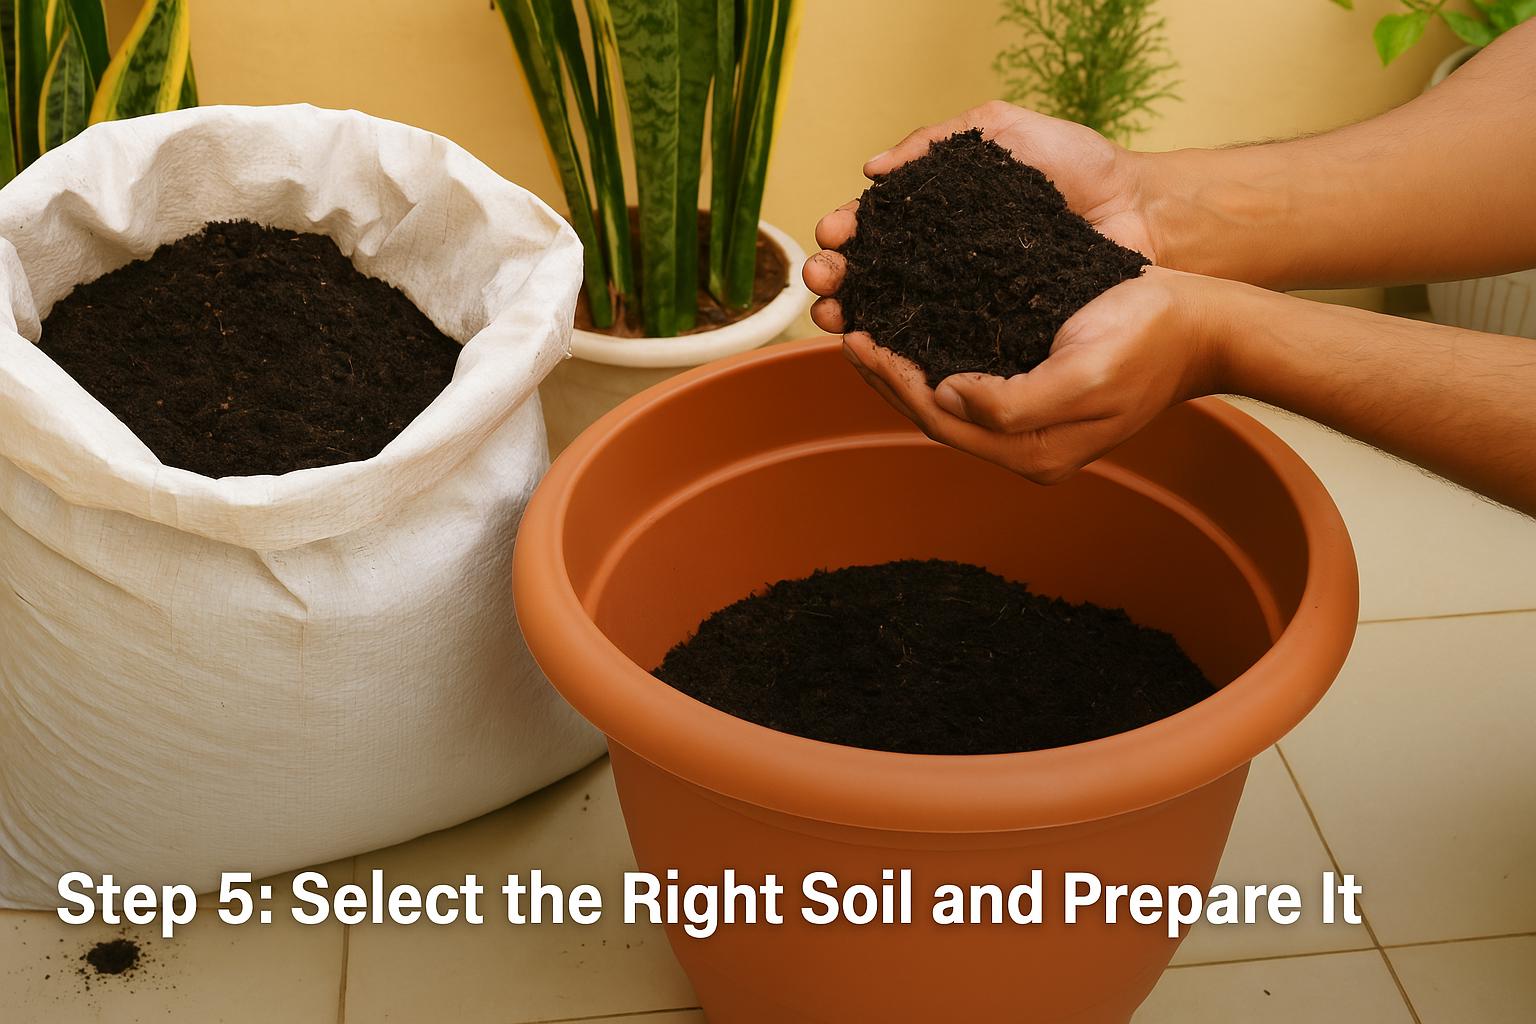
Soil is the foundation of your garden. In containers, using the right soil or potting mix is crucial because plants have limited space to gather nutrients. Beginners sometimes overlook this and use ordinary dirt, leading to poor results. Let’s make sure your plants get a healthy start with good soil.
How to Choose Soil for Start a Garden In Limited Space
For urban gardening, it’s best to use a light, well-draining, and nutrient-rich potting mix rather than heavy garden soil alone.
A classic formula many Indian gardeners use is: 1 part garden soil + 1 part compost + 1 part cocopeat (coir). This creates a balanced mix that retains moisture yet drains well, and is rich in organic matter.
Garden soil provides minerals and structure, compost (or manure) provides nutrients and beneficial microbes, and cocopeat improves aeration and water retention.
Cocopeat (coconut coir) is widely available in India – usually sold as compressed bricks that you soak in water to expand.
It’s great for container mix because it’s lightweight and holds moisture like a sponge. According to one guide, mixing soil, compost, and cocopeat in equal parts makes an ideal potting soil for edibles. – it’s a tried-and-tested blend.
If you don’t have compost or manure readily, you can buy a bag from any plant nursery (cow dung manure is common, just ensure it’s well-rotted and odorless, indicating it’s decomposed and safe for plants).
Vermicompost (compost made by earthworms) is excellent and available in 1-2 kg packets from brands like Urban Plant or local organic farms.
How to Preparing Soil For start an Urban Gardening
Once you have the components:
- Take a bucket or tub, and mix your ingredients thoroughly (for example, 2 parts soil + 1 part compost + 1 part cocopeat if your soil is heavy clay; or equal parts as a general mix). Break up any clumps. Remove any debris like stones or twigs.
- You can also add a few handfuls of other amendments if accessible: river sand (for extra drainage, especially if your soil has clay), perlite (white volcanic grains that improve aeration, often found in potting mixes), or vermiculite (helps retain moisture). These are optional – don’t worry if you can’t find them. A bit of coarse sand (builder’s sand, rinsed) can help potted succulents or herbs like thyme that hate waterlogging.
- Mix in a small handful of organic fertilizer if you like – e.g., neem cake powder or bone meal – which will slowly release nutrients. Again, optional but can give a boost.
- Moisten the mix lightly with water so it’s damp (not soggy) – this helps when filling pots and planting.
How to Fill Containers or Pot To Start Your First Garden on Terrece
Before adding soil to pots, ensure drainage holes are clear. It’s a good idea to put a piece of broken pot or a few small stones over the hole at the bottom of each pot, to prevent soil from leaking out while still letting water drain.
Then fill the container with your prepared potting mix.
Fill it up to about 1-2 inches below the rim (leaving some space so you can water without overflow). Do not pack the soil too tightly – just lightly firm it. Roots need oxygen, so you want a fluffy texture.
For very small pots (like for succulents or tiny herb pots), you might use a higher proportion of sand or perlite since those can dry out fast. For bigger pots, the general mix is fine.
How to Choose the Right Soil Type
If you’re buying ready-made potting soil, check if it’s tailored for veggies. Most general potting soils in garden stores will work for flowers and veggies alike.
There are also specialized mixes like “succulent mix” (more sandy) or “orchid mix” (chunky bark etc.), but for our purpose (edibles and common plants), a universal potting mix is good. Many urban gardeners in India recommend brands like Urban Plant Organic Potting Mix or Cocopeat-based mixes which come pre-fertilized.
These can be directly filled into pots. One thing to note: some store-bought mixes are soilless (mostly cocopeat and compost). They are wonderfully light and plants grow well, but over time you’ll need to add nutrition (compost/fertilizer) since pure cocopeat has no nutrients by itself. It’s often mixed with manure/compost though, which provides nutrients.
How to Sterilizing Soil: It's Optional
Sometimes, soil from unknown sources can have pests or fungus. A precaution some take is to sterilize soil by heating (not always practical) or at least sun-drying it.
If you faced issues like ants or fungus gnats, you can bake small batches of soil in an old cooker (without whistle, 15-20 min) to kill pathogens – but this is usually not needed if you use a good mix and maintain plant health.
Using neem cake in the soil mix naturally helps repel soil pests.
To sum up, good soil = healthy plants. Don’t skimp on this step. A well-prepared potting mix will ensure your plants have a loose medium for their roots to expand and plenty of nutrients to draw from.
In the coming weeks, the nutrients in compost will feed your plants. As plants grow, we’ll add fertilizers (Step 8) to replenish nutrients.
Now that your pots are filled with healthy soil, it’s time for the fun part – planting!
Step 6: Choose Suitable Beginner-Friendly Indian Plants (Herbs, Veggies, Flowers)
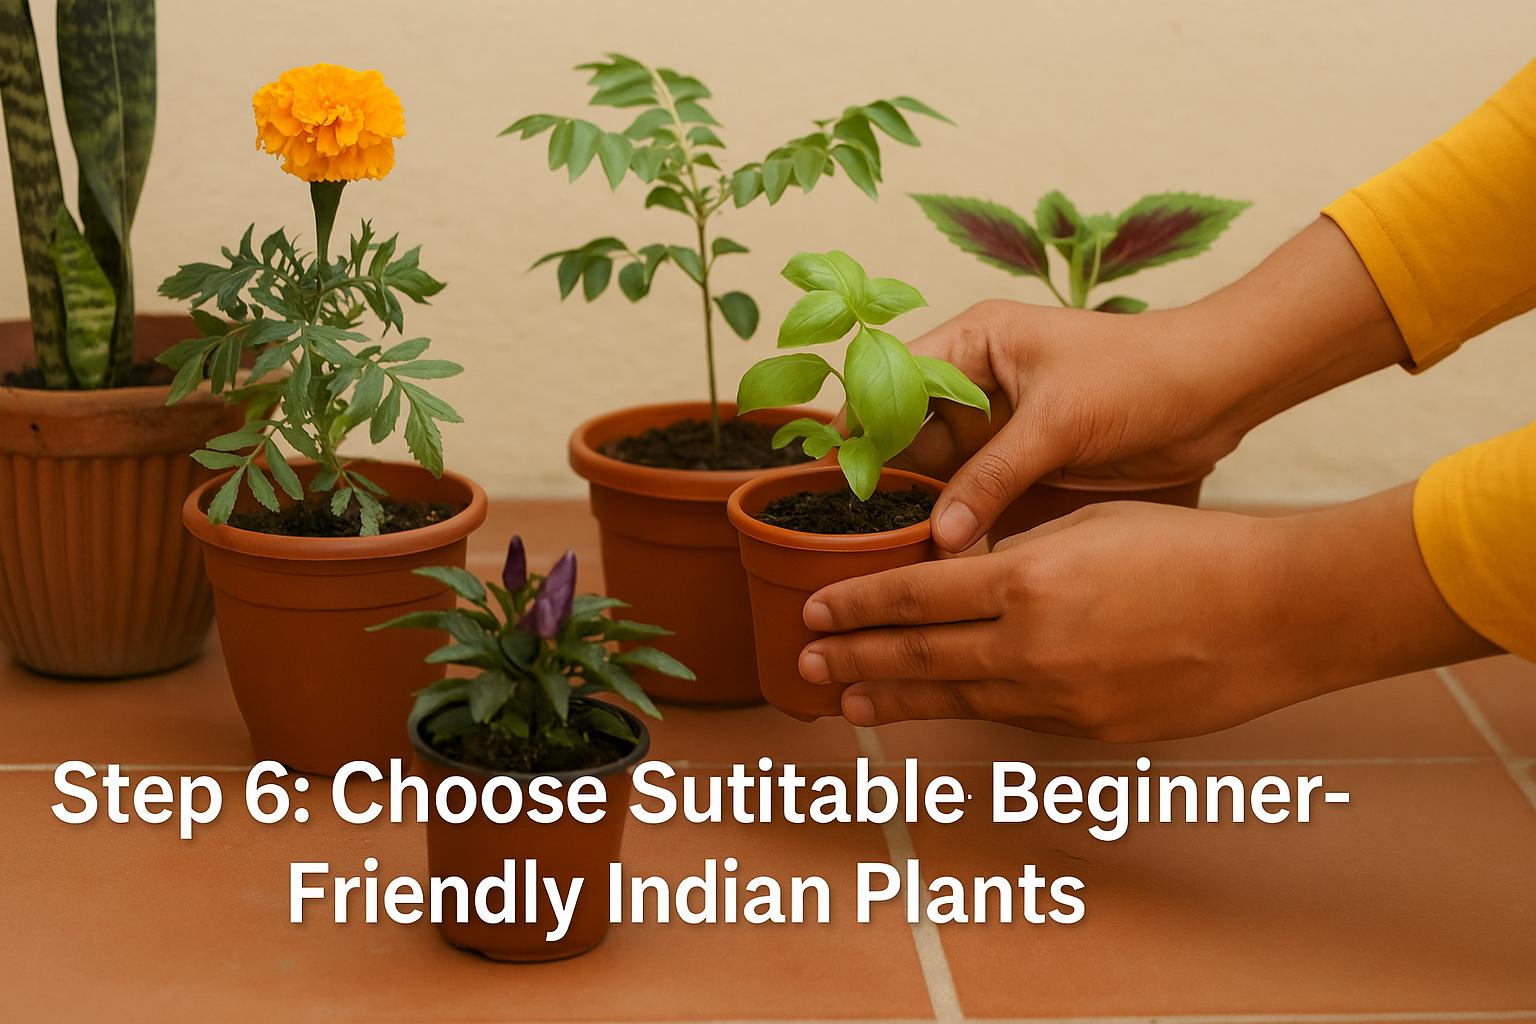
We touched on some plant options in Step 1, but now let’s select specific easy, beginner-friendly plants to actually grow.
The right plant choices will set you up for success. Here are recommendations in three categories – herbs, vegetables, and flowers – that grow well in Indian home gardens and require minimal fuss:
Choose Suitable Herbs and Greens
These are highly recommended for beginners because they’re generally forgiving and grow quickly.
- Mint (Pudina): A hardy herb that grows almost like a weed. Loves partial sun and regular watering. You can start it from cuttings (even stems from market mint can root in water!). Keep it in its own pot as it spreads. You’ll have fresh mint leaves for chutneys and tea.
- Holy Basil (Tulsi) or Sweet Basil: Tulsi is sacred and common in Indian homes – it’s resilient and great for herbal tea. Sweet basil (used in Italian dishes) also grows well in warm weather. Both prefer sun and regular watering. Basil and tulsi also help repel pests – an added benefit.
- Coriander (Dhaniya): You can actually sow coriander seeds from your spice jar (the whole coriander seeds – slightly crush them and sprinkle). They germinate in about a week. Coriander prefers cooler season (best in winter or monsoon) as it can bolt (flower) quickly in heat, but with partial shade you can grow it year-round for leaves. Harvest leaves when fairly young for best taste.
- Fenugreek (Methi): Easiest leafy green to grow from seed. Sow methi seeds (available in grocery stores) densely in a wide pot, barely cover with soil, and they’ll sprout in days. Within 3-4 weeks you can harvest tender methi leaves for sabzi. It doesn’t even need full sun – does fine in 3-4 hours light.
- Rosemary, Thyme, Oregano: If you have a sunny spot and like Italian flavors, these Mediterranean herbs do well in India’s climate too (especially rosemary and oregano). They prefer well-drained soil (more sand) and not overwatering. You can get small plants from a nursery. They’re perennial, meaning they last for years.
Why herbs? Because “if you’re a first time gardener, begin with easy growing herbs” – they’re often recommended since they’re easy to find and simple to grow. Plus, you get continuous harvest: pluck a few leaves as needed and the plant keeps growing.
Choose Suitable Vegetables
For beginners, choose veggies that grow fast, are relatively compact, and have a high success rate in containers.
- Tomatoes: Cherry tomatoes or dwarf varieties are best for pots (they produce lots of small tomatoes quickly). Tomatoes need good sun (6+ hours ideally). You can grow from seed (sow in small cups and transplant) or buy a seedling. Stake or support them as they grow. They reward you with lots of tomatoes if kept well-fed and watered. (Note: Tomatoes may attract pests like caterpillars or aphids, but those can be managed organically – see Step 9.)
- Green Chillies: A must-have for many Indian kitchens! Chili plants stay relatively small (1-2 feet) and produce plenty of chillies. They love sun and warmth. You can start from seed (germination can take 1-2 weeks) or seedlings. Common varieties like Sankeshwari or Jwala are vigorous. Keep soil consistently moist but not waterlogged.
- Okra (Bhindi): Okra grows tall (2-4 feet) but can be grown in a medium pot (choose a 10-12 inch deep pot). It tolerates heat and actually thrives in hot weather, making it great for Indian summers. Sow seeds directly in the final pot (about 1 inch deep). They sprout in a week. Harvest okras when tender.
- Beans: Many types of beans do well. Bush beans (French beans) stay compact and yield in about 2 months. Pole beans (like runner or lablab beans) need a climb support but are very productive. Beans can be sown in monsoon or spring. They enrich soil with nitrogen too (being legumes).
- Cucumber: (disease-resistant hybrid varieties can do well in a big pot with a trellis to climb), Capsicum (Bell Peppers) – grow similarly to chillies but a bit bushier, need good feeding, Curry Leaf plant – if you have space for a small tree in a big pot (it’s slow growing but eventually gives endless supply of curry leaves).
It’s wise to mix a few fast growers (like greens or radish) with a few that take longer (like tomato), so you get some early rewards while waiting on the others.
Also, start with a manageable number of plants – perhaps 4-5 different veggies or herbs in your first season. You can always add more once you get the hang of it.
Importantly, try to source quality seeds. Many Indian beginners have success using kitchen seeds (methi, dhaniya, chili from dry chili, etc.), but for veggies like tomato or okra, buying a packet of certified seeds can ensure better germination.
Kraft Seeds offers beginner-friendly seed kits (often a mix of popular veggie seeds). There are even “seed kits” for kids or beginners that bundle easy plants.
Choose Suitable Flowers
Adding a couple of flower pots will not only beautify your garden but also can help attract pollinators (like bees and butterflies) which is great for your veggies. Beginner-friendly flowers for Indian climates include:
- Marigold (Genda): Perhaps the easiest annual flower. You can grow African marigolds (larger, pom-pom like flowers) or French marigolds (smaller, profuse blooms). Marigolds are resilient and pest-resistant – they actually repel certain insects and nematodes.
- Zinnia: Bright, daisy-like flowers that come in many colors. They do well in full sun and warm weather. Zinnias are heat and drought tolerant and generally low-maintenance. Just give them decent soil and they’ll reward you with continuous blooms. Great for summer.
- Sunflower: Dwarf sunflowers can be grown in a pot (look for “dwarf” or “container” sunflower seeds). They love the Indian sun (as the name implies!). They can grow 1-2 feet tall in pots and produce cheerful yellow faces. Kids especially love growing sunflowers.
- Calendula (Pot Marigold): Grows in winter, lovely orange/yellow daisy-like flowers that also have medicinal uses. Easy from seed in cooler weather.
You can choose one or two flowering plants to start with. Tip: If growing edibles, prioritize those, and maybe add one flowering pot like marigold for color and pest control benefits.
Step 7: Planting Instructions with a Basic Calendar
Let’s sow those seeds and plant those seedlings! Proper planting technique and timing will set your garden on the right track.
We’ve already discussed the seasonal timing in Step 4; here, we’ll combine that knowledge with the actual act of planting in your prepared pots.
General Planting Steps
1- Seeds vs Seedlings
Decide if you are planting seeds directly or transplanting seedlings. Many fast growers (leafy greens, radish, beans) can be directly sown into their final containers.
Others with delicate starts (tomato, chili, brinjal) are often started in a small nursery tray or cup and then moved to bigger pots once they are 3-6 inches tall.
This controlled start (often called raising seedlings or nursery method) can give higher success for certain plants.
2- Direct Sowing (for seeds)
Loosen the topsoil in the pot, sprinkle seeds according to their size and recommended spacing, cover lightly with soil, and water gently.
- Tiny seeds (like basil, lettuce, oregano): sprinkle on surface, just press them into soil or cover with a very thin layer of soil. They need light to germinate often.
- Small to medium seeds (coriander, methi, spinach): sow about 0.5 cm deep (just under the surface). You can scatter them for a “carpet” of greens or plant in rows in a larger box.
- Larger seeds (beans, peas, okra): these go deeper, about 1-2 inches deep. A general rule: plant seeds at a depth about 2-3 times their diameter.
- After sowing, water using a fine spray or by bottom-watering (keep pot in a tray of water for a few minutes) so you don’t wash the seeds away.
- Keep the soil consistently moist during germination. This may mean watering a little every day (if the top looks dry, mist it). In hot weather, you can cover the pot with a newspaper or wet jute sack to prevent drying (remove it once seeds sprout).
- Germination times differ: radish and methi sprout in 2-3 days, beans in 4-6 days, tomatoes in 6-8 days, chili in 8-12 days, etc. Be patient and don’t dig up seeds to check – they’ll emerge when ready!
3- Transplanting Seedlings
If you bought a seedling from a nursery or grew one in a small pot, transplant it carefully.
- Best done in the evening or a cool time of day (so plant can recover overnight).
- Make a hole in the prepared soil of the larger pot (hole big enough to fit the root ball).
- Gently remove the seedling from its old container – try not to disturb roots too much. Tip: water the plant an hour before transplanting, so soil clings to roots.
- Place it in the hole, fill soil back around it and press gently. The plant should end up at the same depth it was originally (except tomatoes – those can be buried a bit deeper as they grow roots on the buried stem).
- Water immediately after transplanting to settle the soil around roots. Keep the plant in shade for a day or two if possible, to reduce transplant shock, then move to sun.
4- Spacing and Thinning
If you sowed seeds thickly (like mustard, spinach, etc.), you may need to thin them after they sprout – that means removing some seedlings so that those remaining have room.
For example, if 20 methi seeds sprouted in a small pot, gently pluck out some to leave maybe 5-10 seedlings so they can grow bigger.
You can use the thinnings as microgreens in salads! Always follow approximate spacing guidelines given on seed packets or from resources. Overcrowding can lead to weak growth or more disease due to poor air flow.
5- Basic Care After Planting
Keep the soil moist (young seedlings dry out faster than established plants). Ensure they get appropriate light – seedlings can get leggy (tall and weak) if they don’t get enough sun.
If it’s peak summer, provide a little afternoon shade for tender new plants to prevent wilting.
Planting Calendar Highlights: (India-specific as mentioned)
- June-July (Monsoon onset): A great time to plant many veggies. Consider this the start of the gardening year for many Indian gardeners because rains make it easier. Plant your gourds, beans, okra, and also start seeds of winter veggies in seed trays around August (like cabbage, cauliflower) to transplant later. Also, propagate flowering plants now so they bloom by fall.
- Oct-Nov (Post-monsoon/Winter beginning): Another big planting season. Direct-sow spinach, carrots, radish now. Transplant your tomato/chili seedlings from monsoon sowing if you started earlier. Plant flowering annuals (marigold, petunia, calendula) for winter color.
- Jan-Feb: Harvest time for many winter crops (enjoy your peas and carrots!). Also time to start thinking of summer – sow tomato and chili seeds now (indoors in North India, or outdoors in South) for the summer crop. Plant watermelon or cucumber seeds toward Feb in warmer parts.
- Year-round: Herbs like basil, mint can be propagated almost any time (though basil might struggle in peak winter cold). Methi and microgreens can be sown anytime you have a spare pot – they are very quick to harvest. Succession planting is wise: for instance, instead of sowing a whole packet of lettuce in one go, sow a few seeds every 2-3 weeks so you get continuous harvests rather than one glut.
Container specifics: In containers, you might slightly adjust timing – for example, pots heat up faster, so you could start a bit earlier in spring. Also, you can move pots – e.g., if heavy rains are drowning a chili plant, move it under a porch for a week.
By following a basic planting calendar and paying attention to your seedlings, you’ll have a continuous cycle of growth.
One tip: Label your pots with what you planted and the date (use a popsicle stick or tape) – this helps you remember varieties and anticipate germination/harvest times.
Step 8: Watering and Fertilizing (Organic and Chemical Options)
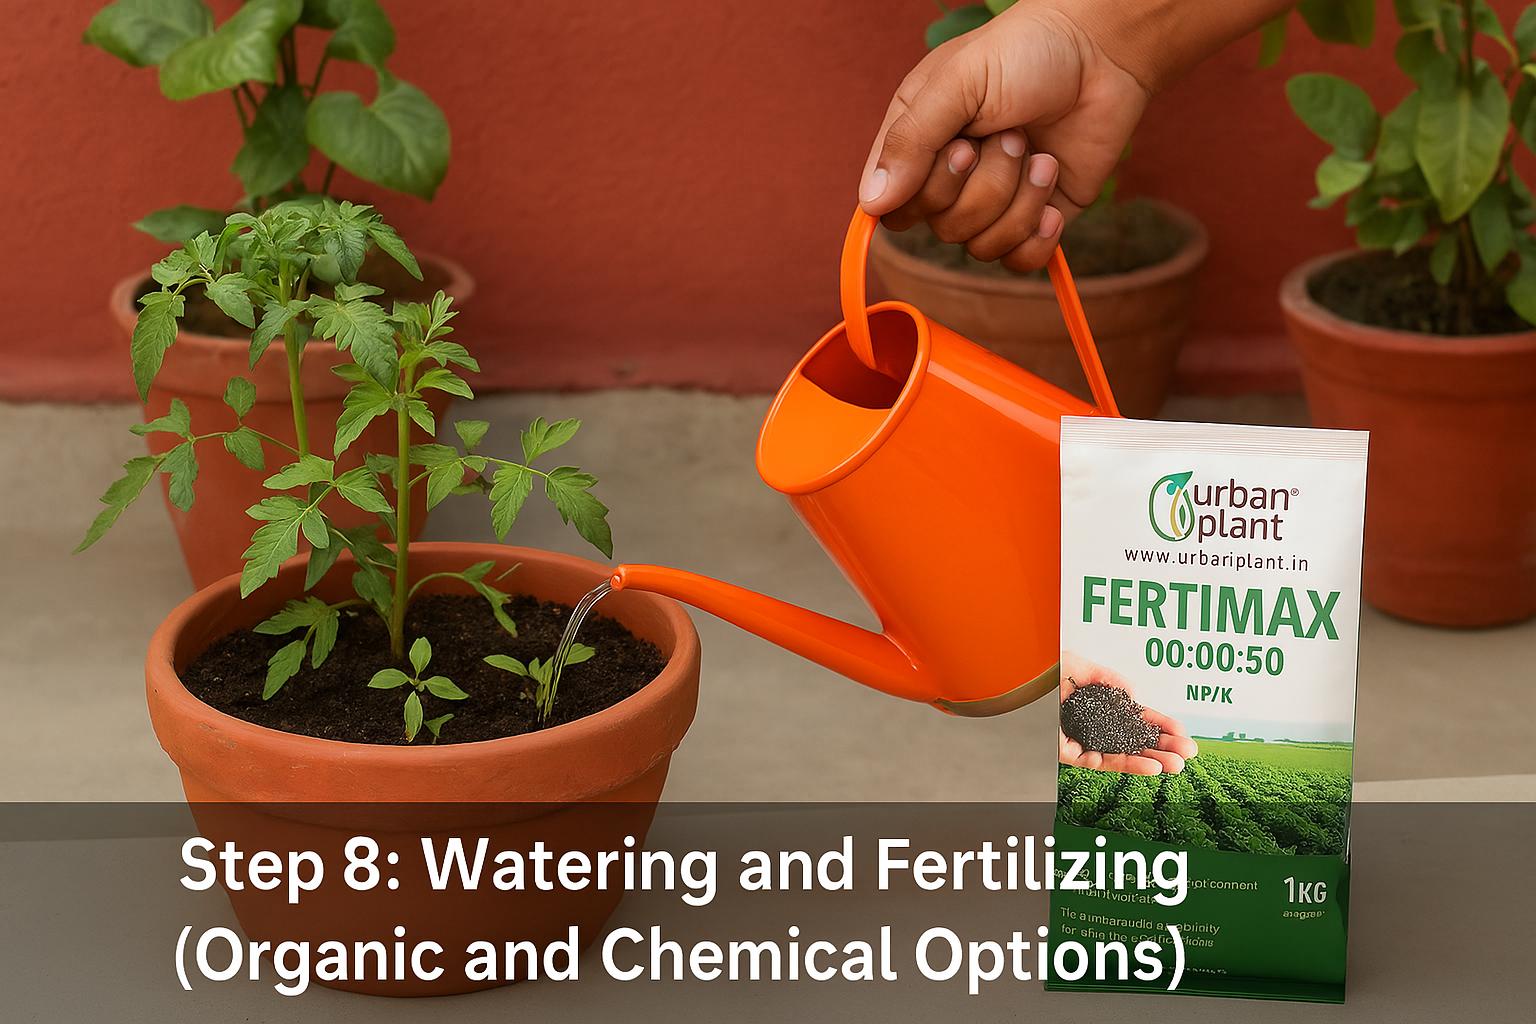
Plants, like all living things, need food and water. In an urban container garden, you are the source of these essentials since containers can’t draw from the ground or store much. Proper watering and fertilizing will keep your garden thriving.
Let’s break down how to water and feed your plants, with options suitable for India.
Watering Tips to Start Your First Garden
- Consistency is Key: The goal is to keep the soil consistently moist but not waterlogged. Check your pots daily, especially in hot weather. Stick a finger 1 inch into the soil – if it feels dry at that depth, it’s time to water. Most plants in containers need watering once a day in summer, possibly twice on extremely hot days. In cooler months, every 2-3 days might suffice. Avoid letting the soil completely dry out for young or thirsty plants, as they can wilt quickly.
- Morning vs Evening: It’s generally best to water in the early morning or evening. Morning is ideal because plants get hydrated before the day’s heat and leaves dry out (reducing fungal risk). Evening watering is common too, but in very humid conditions it can sometimes promote fungus since leaves stay wet overnight. If you water in evenings, try to water the soil directly and keep foliage dry.
- Technique: Use a gentle watering can or a hose with a fine nozzle. Pour slowly at the base of the plant until water starts to drain out the bottom holes – that ensures deep watering. Avoid splashing water on leaves in strong sun (water droplets can cause leaf burn in intense sun). For small seedlings, use a light sprinkle or mist to avoid displacing them.
- Avoid Overwatering: While underwatering is a quick killer in hot weather, overwatering is actually a more common cause of plant death among beginners. Too much water = roots rot due to lack of oxygen. Symptoms can look similar to drought (wilting) which confuses people. As a rule, if the top inch of soil is still moist, do not water yet. Also, always empty any excess water that collects in trays under pots to prevent root rot and mosquito breeding.
- Rainy season: In monsoon, you might not need to water daily if rain is frequent. But don’t assume the rain took care of it – check the soil, since some sheltered spots might not get much rainwater. Conversely, move plants out of heavy rain if they are getting waterlogged; after rains, tilt pots to drain excess water if needed.
One good guideline: “Overwatering is worse than under-watering, as it rots the roots. Remember, you can revive a dry plant but not one whose roots have drowned!”. This saying is very true in container gardening.
Fertilizing (Feeding Your Plants) for start Your First Garden
Potted plants exhaust nutrients in the soil over time, so feeding them is important. You have two broad choices – organic fertilizers or chemical fertilizers, or a combo of both.
Using organic options is generally safer for edible plants and better for soil health, but chemical fertilizers can give quick results if used carefully.
Let’s explore both, with examples available in India:
Organic Fertilizers:
Compost & Manure: The best and simplest food. If you mixed compost or manure in your soil (Step 5), your plants have a baseline of nutrients. After ~4-6 weeks, you can top up by adding a handful of vermicompost or manure on top of the soil (called top-dressing). When you water, nutrients seep down. You can repeat this every month for heavy feeders (fruity veggies) or every 2-3 months for herbs/flowers.
Liquid Organic Fertilizers: These are quick-acting and can be homemade or store-bought: Neem Oil Cake Tea, Vermiwash, Compost Tea, and Panchagavya or Jeevamrit
Chemical Fertilizers
- These are the typical NPK (Nitrogen-Phosphorus-Potassium) mixes or other salts that feed plants directly. In containers, water-soluble fertilizers are commonly used for quick uptake.
- A popular choice is NPK 19-19-19 (available widely, you dissolve a small spoonful in water and apply). It provides a balanced nutrient supply. Others include 20-20-20 or specific ones like Urea (46-0-0) for nitrogen, DAP (18-46-0), Potash (0-0-50) etc., but as a beginner it’s easier to stick to a balanced mix or a packaged “vegetable fertilizer”.
Note: While chemical fertilizers give rapid growth, they don’t improve soil long-term and can build up salts. So it’s good to flush pots with plain water occasionally (let excess water drain out to wash out salts).
Step 9: Pest and Disease Control Using Organic Methods
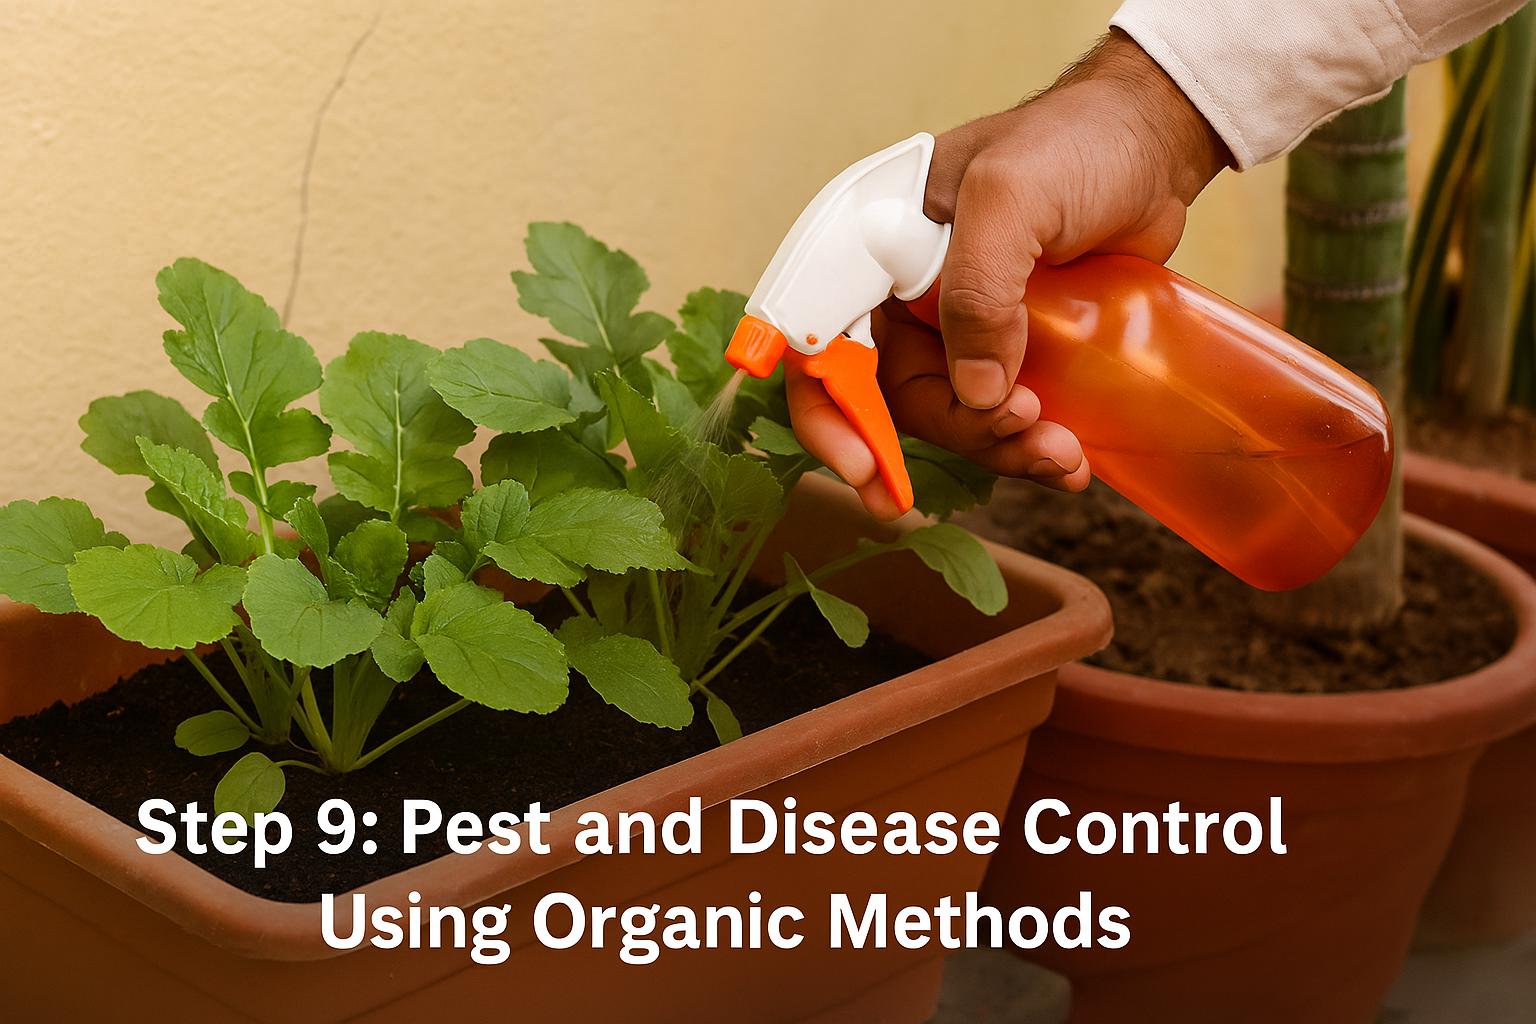
A flourishing garden can sometimes attract unwanted guests – pests (insects that chew on leaves or suck sap) and diseases (fungal or bacterial issues).
Especially in India’s warm climate, things like aphids, mealybugs, or powdery mildew can pop up.
But don’t panic! You can manage most of these organically, i.e., without harsh chemicals, keeping your garden healthy and safe for you to eat from.
Here are common problems and organic solutions:
- Aphids (Plant Lice): Tiny green, black, or white soft-bodied insects often found in clusters on new growth or underside of leaves. They suck sap, causing leaves to curl. Solution: Wash them off with a strong jet of water. Then spray a soap solution (1 teaspoon mild liquid dish soap in 1 liter water) on affected areas; soap suffocates them. Neem oil spray (5 ml neem oil + 2 ml soap as emulsifier in 1 liter water) is very effective – neem’s bitter compounds deter feeding and reproduction.
- Mealybugs: These look like tiny white cottony fluff patches, usually on stem joints or underside of leaves. They suck sap and secrete sticky “honeydew” making leaves shiny/sticky and prone to black sooty mold. Solution: Dab visible mealybugs with cotton swab dipped in rubbing alcohol (this dissolves their protective coating). Then use neem oil spray as above, thoroughly on the plant (top and bottom of leaves).
- Whiteflies: Tiny white flying insects that flutter up when you disturb the plant. They also suck sap and cause yellowing. Solution: Yellow sticky traps can catch a lot of whiteflies (you can DIY by smearing petroleum jelly on a yellow card and placing near plants). Neem oil spray works on them as well, as does soap spray.
- Caterpillars: You might find chewed leaves or droppings (little black pellets) – cabbage worms or other caterpillars (often from butterflies/moths laying eggs). They can decimate leafy plants or flowers quickly. Solution: Hand-pick any caterpillars you see (wear gloves if squeamish) and dispose of them. Use an organic spray like Bt (Bacillus thuringiensis), a bacteria that specifically kills caterpillars (available as a biopesticide powder/liquid in some gardening stores).
- Root Rot: If a plant looks wilted despite watering, and leaves yellow uniformly, it could be root rot from poor drainage/overwatering (a “disease” scenario for roots, often fungal). Solution: Unpot and check roots – if mostly black/brown and mushy, it’s tough to save.
One effective overarching solution is neem oil – to emphasize its use: Neem is a natural extract from the neem tree common in India, and it works as a broad-spectrum organic pesticide and fungicide. A quote from a gardening source: “Another natural way to keep insects away is to use neem oil. You can easily find one at your chemist nearby.”.
In summary, monitor your plants regularly. Early detection of pests makes them easier to control. Inspect under leaves, check soil for any mold or pests, and act promptly.
Step 10: Regular Garden Maintenance Tips
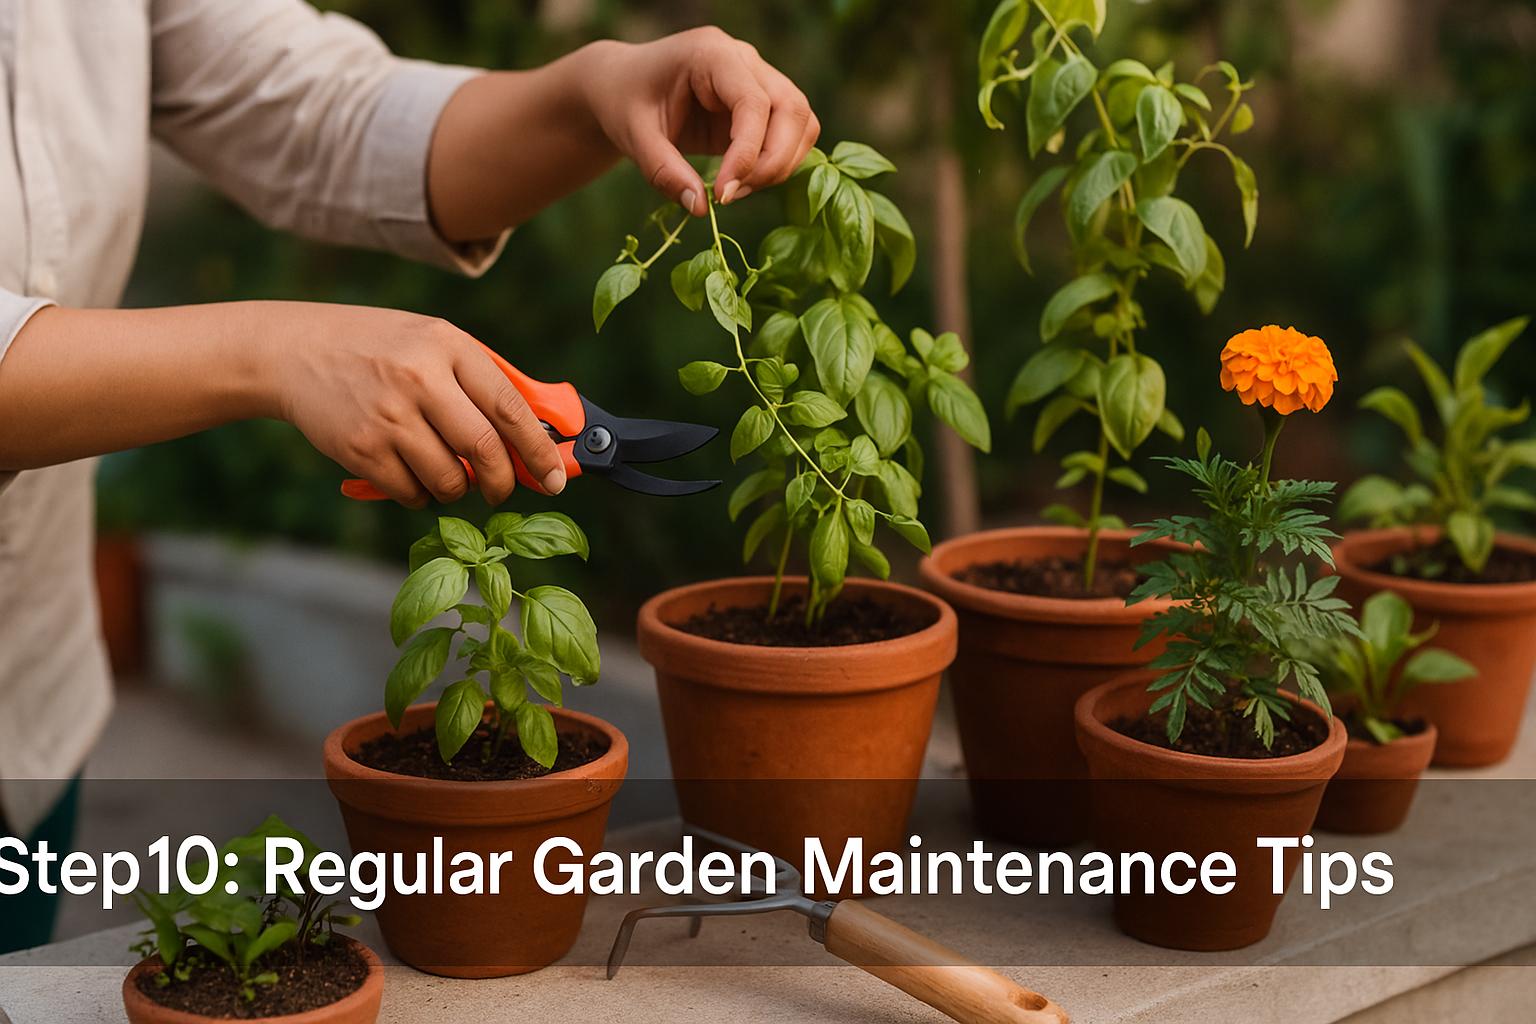
Congratulations – if you’ve followed the steps so far, you officially have an urban garden growing!
Now, gardening becomes an ongoing activity. Maintenance is about doing small tasks regularly to keep your garden healthy and productive.
Here are the key maintenance tips for your urban garden in India:
- Daily/Weekly Lookover: Spend a few minutes each day (or at least a few times a week) just observing your plants. This is enjoyable and preventative – you’ll catch issues early. Look for signs of wilting (needs water), yellow leaves, spots, or pest presence (holes in leaves, sticky residue, etc.). Early detection lets you intervene before it gets serious (tie this with Step 9’s solutions). Also, notice growth – seeing new buds or leaves will boost your confidence!
- Weeding: Even in pots, weeds can sprout (from wind-blown seeds or dormant seeds in soil/compost). These are unwanted plants that compete for nutrients. Every now and then, pluck out any grass or tiny weed seedlings you see. It’s easiest to do after watering when soil is soft. Keeping containers weed-free ensures all resources go to your intended plants.
- Pruning and Pinching: Regularly remove dead or yellowing leaves from plants. This tidies the plant and prevents disease spread. For flowering plants, deadhead spent blooms (pinch off the dried flowers) – this encourages more flowering. Some vegetables also benefit from pinching: e.g., pinch the tips of basil frequently to promote bushier growth (and prevent it from flowering too soon, which can reduce leaf production).
- Staking and Support: As plants grow taller, ensure their supports are in place. Tie stems loosely to stakes with a soft tie (cloth strip or twine) for plants like tomatoes or beans. Check that the weight of fruits (like tomatoes or gourds) isn’t causing the plant to topple – add stakes or rearrange if needed. If you have climbers, help train them onto trellises.
- Watering routine: By now you likely have a schedule. Adjust as needed with weather changes. On a vacation or out-of-town trip, arrange for someone to water your plants, or set up a simple drip system (even a bottle with a tiny hole inverted in the pot can drip water slowly for a couple of days).
- Cleanliness: Keep the garden area clean. Pick up fallen leaves that might harbor fungus (unless you leave some as mulch). Clean any algae from drip trays or dirt from the balcony floor to avoid slips.
- Soil Care: After a heavy rain or over time, soil in pots can compact. Gently loosen the topsoil with a fork periodically, careful not to damage roots, to help aeration. If the soil level has settled and is low, add some fresh mix or compost on top.
Your urban garden will evolve with time – you might start adding more pots, trying new varieties (perhaps graduating to fruits like strawberries or a dwarf lemon plant!), and optimizing your setup (maybe installing a vertical garden stand or drip irrigation).
It’s a journey from a beginner to a seasoned gardener. Keep experimenting, keep learning, and keep growing – literally!
By following these 10 steps, you’ve moved from dreaming about a garden to actually nurturing one.
Urban gardening in India is absolutely achievable, even in a cramped apartment or busy schedule.
With a bit of planning, the right tools, and consistent care, your small green space will thrive.
FAQs
Q1: I live in a very small apartment with no balcony. Can I still do urban gardening?
Ans- Absolutely! Even without a balcony, you have options. You can grow potted plants indoors near a sunny window. Herbs like basil, mint, and coriander can do well on a windowsill that gets a couple of hours of sun.
Q2: My balcony gets only 2-3 hours of direct sun. What plants will grow in low sunlight?
Ans- If you have limited direct sunlight, focus on shade-tolerant or partial-sun plants. Many leafy vegetables and herbs can grow with just a few hours of sun. For example, spinach, lettuce, kale, mint, coriander, and parsley can manage in 3-4 hours of light (especially if it’s morning sun).


